
We all love our Arduinos, but once you have a prototype of your project working on an Uno R3 connected to a breadboard with Dupont wires – then what? You can hardly put all that in a box, and you’ll need those parts for your next prototype anyway.
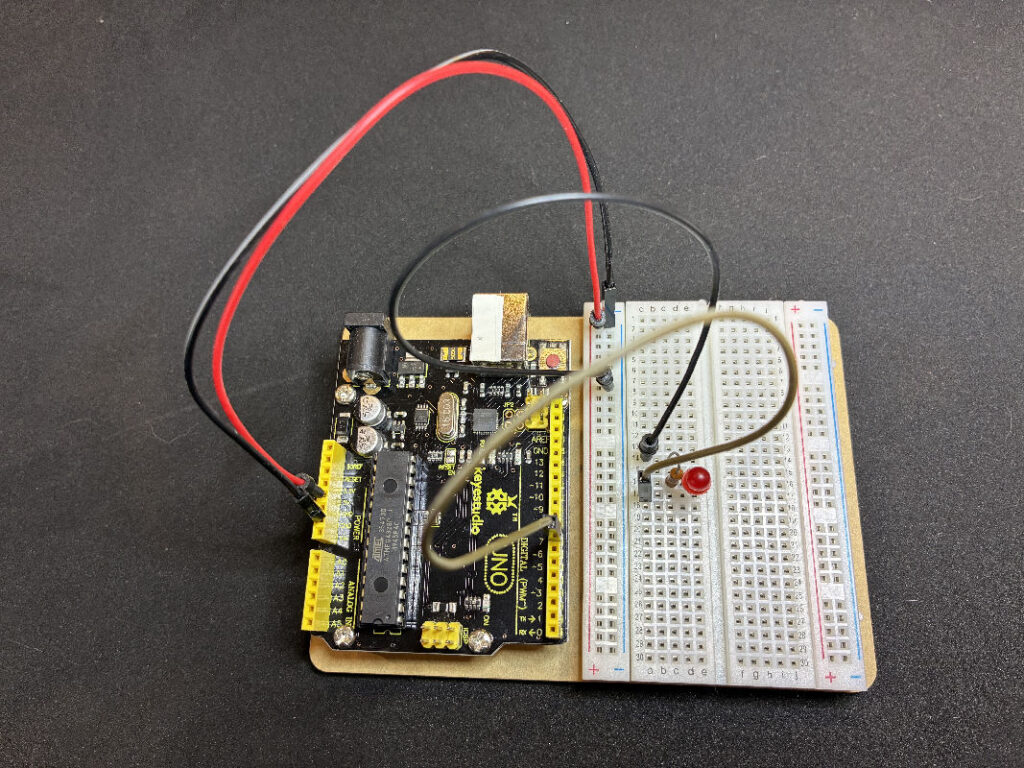
The solution is to design and build your own custom PCB, but what do you do with your Arduino sketch to make the project work? This is not as difficult as it may first seem. The AVR microcontrollers that are at the heart of the Aurdunio development boards are widely available and easy to obtain. You will also need a standalone programmer for the microcontroller chip so that it can be programmed using the Arduino IDE.
The most widely known AVR microcontroller is the ATmega328, which is used in both the Uno R3 and the Nano development boards, closely followed by the ATtiny85, which has been widely used by the maker community for projects not needing all of the features of the ATmega328 due to its small size and lower cost.
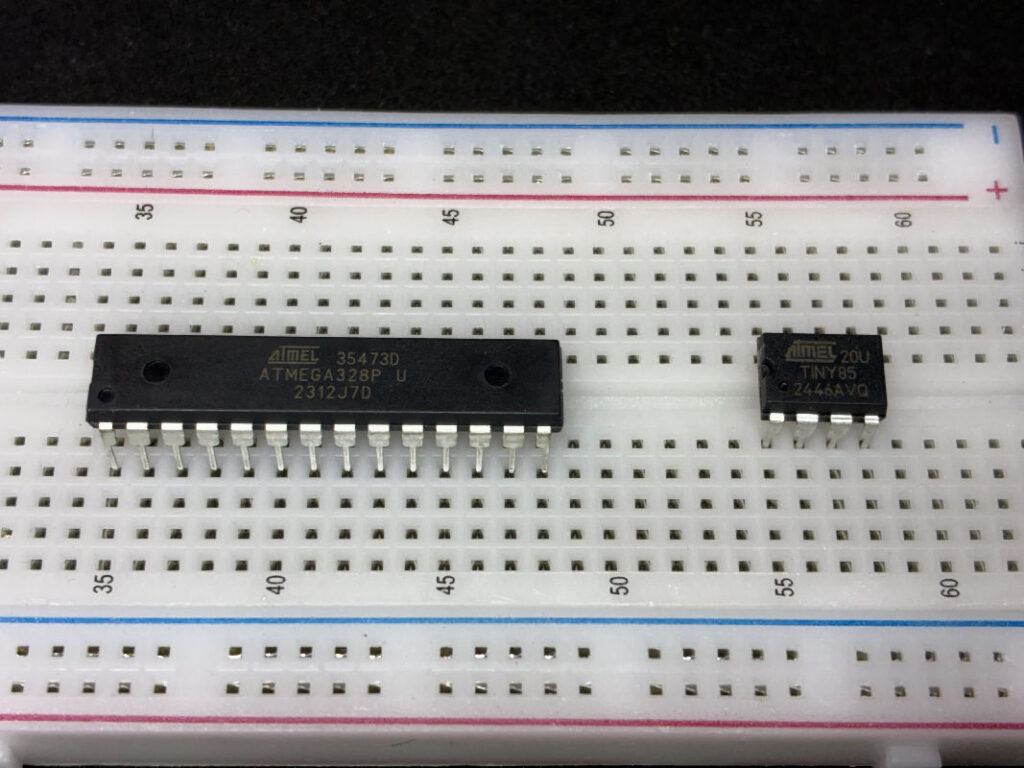
However, Microchip released an updated range of microcontrollers in 2017 that largely supersedes the previous range and has more features, lower cost, and is easier to use. The main differences are that the new chips are not available as DIP packages, and they use a different (though simpler) programmer. So, the “old range” (including the ATmega328 and ATtiny85) is considered “legacy”; however, they are still in production and widely available.
Programming
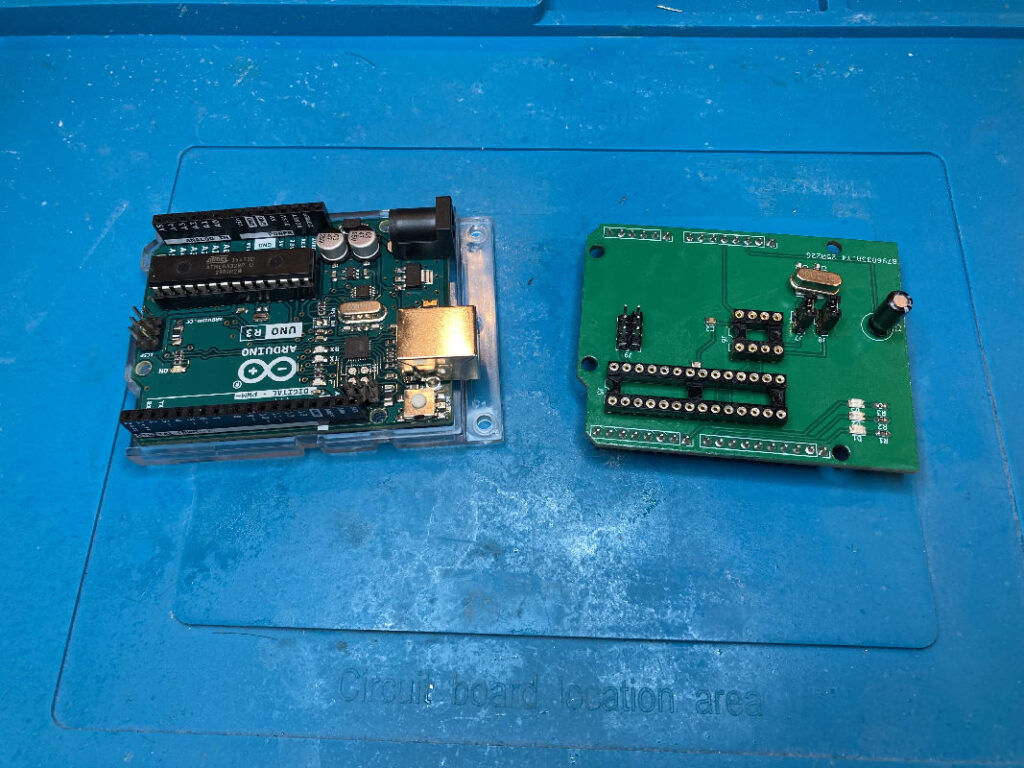
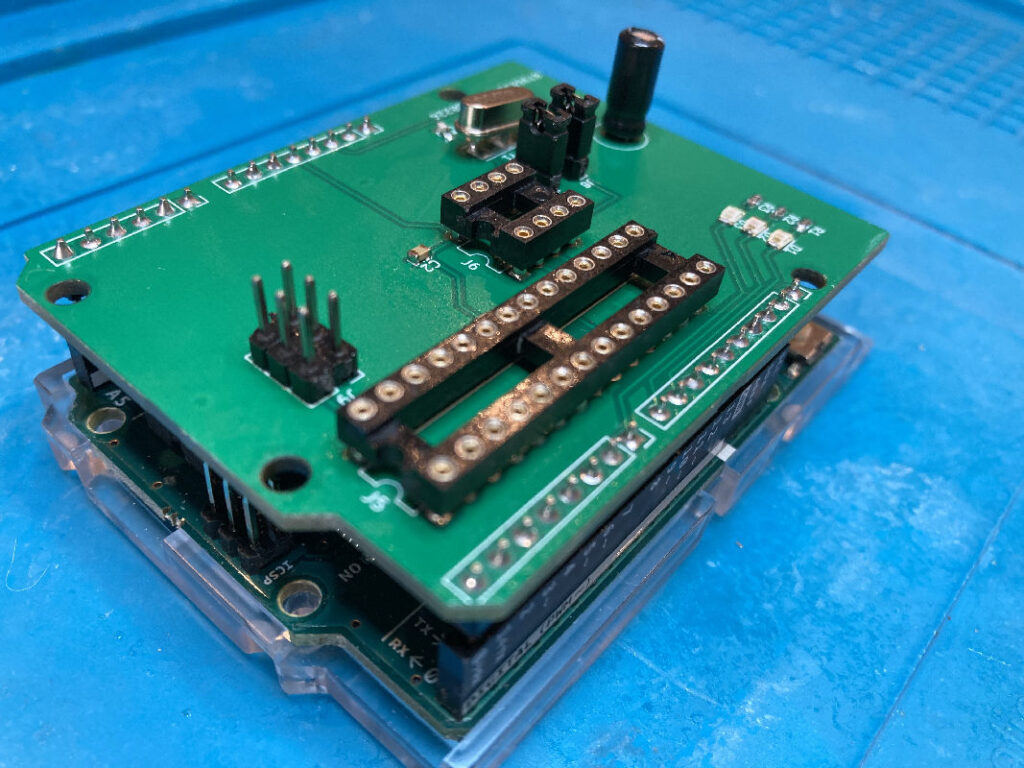
The “old range” of microcontrollers (eg ATmega328, ATtiny85) uses a 6-wire ICSP interface for programming. This can be achieved using a Uno R3 and a simple Arduino shield (or a breadboard if you want to DIY).
This is the shield that I designed:
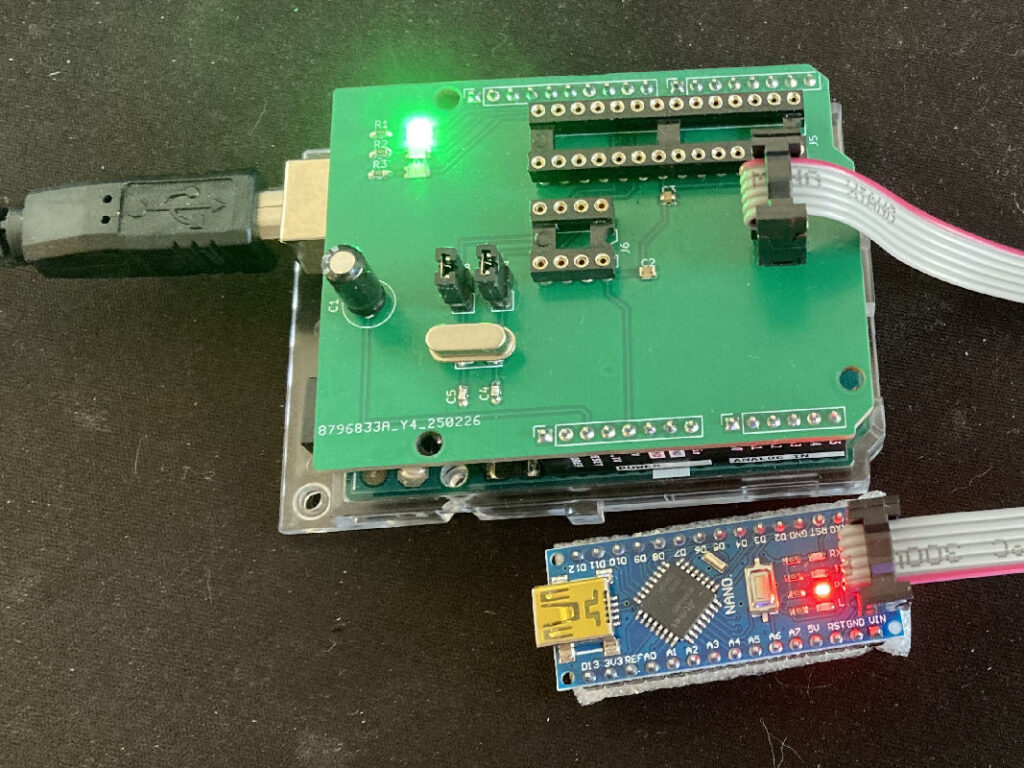
https://github.com/PaulShipley/AVR-Programmer/tree/master/avr-ICSP
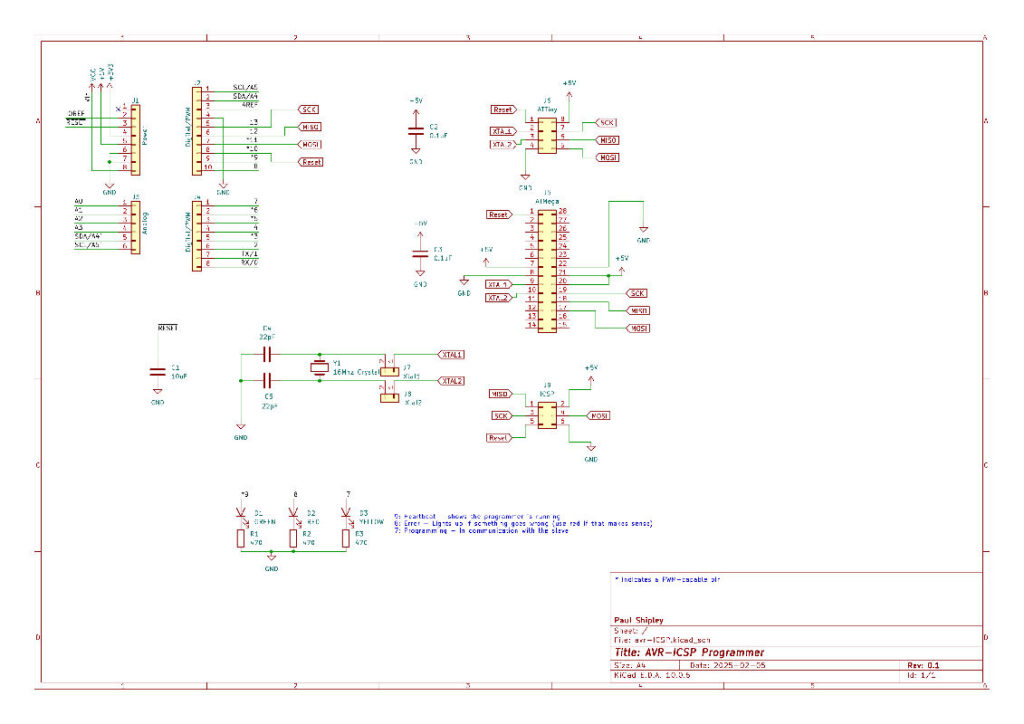
There are three programming options:
- ATmega328 DIP-28
- ATtiny85 DIP-8
- ICSP header (6-pin)
Note that only *one* of these can be used at a time.
Usage
Program ATtiny85 via Uno With ICSP
Given that the ATtiny85 only has 8 pins and all of them are required for programming, the chip will need to be removed from your custom board and placed in the 8-pin socket on the Shield to be programmed.
Add Support for the ATtiny85 to the Arduino URL Board Manager
- Open the Arduino IDE.
- Open the File > Preferences menu item.
- Enter the following URL in Additional Boards Manager URLs:
- Open the Tools > Board > Boards Manager… menu item.
- Wait for the platform indexes to finish downloading.
- Scroll down until you see the attiny entry and click on it.
- Click Install.
- After installation is complete, close the Boards Manager window.
- Close IDE
https://github.com/MCUdude/MiniCore
Set the Arduino Uno Into ISP Mode
- Connect the Uno and open the IDE
- File > Examples > ArduinoISP > ArduinoISP
- A sketch will open; upload it on Uno.
- When uploading is done, unplug the Uno from the PC and close the IDE
https://docs.arduino.cc/built-in-examples/arduino-isp/ArduinoISP
Burn Bootloader
- Connect the Uno and open the IDE
- Open the Tools > Board menu item, select “attiny” and select “ATtiny25/45/85”
- Set Processor: “ATtiny85”
- Set Programmer: “Arduino as ISP”
- Select “Burn Bootloader”
- Disconnect the Uno and close the IDE.
https://www.instructables.com/How-to-Program-an-Attiny85-From-an-Arduino-Uno
Upload sketch to ATtiny85 using Uno as ISP
- Connect the Uno and open the IDE
- Open sketch
- Open the Tools > Board menu item, select “attiny” and select “ATtiny25/45/85”
- Set Processor: “ATtiny85”
- Set Programmer: “Arduino as ISP”
- Open Sketch > Upload Using Programmer
Program Arduino Nano Via Uno With ICSP
Ever wondered what the 6-pin header on one edge of the Uno R3 and Nano development boards was for?
Well, wonder no more – it is for programming the ATmega328 via an ICSP interface.
This was very handy when I received a couple of Nano boards and found they did not have the Bootloader installed. Connecting the Programming Shield to the Nano via their ICSP headers allowed me to install the Bootloader and then use the boards normally via USB.
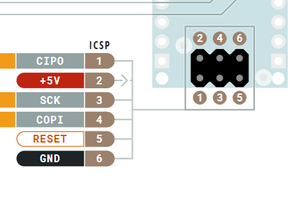
Note that the ICSP header on the Nano is rotated 180 degrees relative to that of the Uno R3.
Install MiniCore
- Open the Arduino IDE.
- Open the File > Preferences menu item.
- Enter the following URL in Additional Boards Manager URLs:
https://mcudude.github.io/MiniCore/package_MCUdude_MiniCore_index.json
- Open the Tools > Board > Boards Manager… menu item.
- Wait for the platform indexes to finish downloading.
- Scroll down until you see the MiniCore entry and click on it.
- Click Install.
- After installation is complete, close the Boards Manager window.
- Close IDE
https://github.com/MCUdude/MiniCore
Set the Arduino Uno Into ISP Mode
- Connect the Uno and open the IDE
- File > Examples > ArduinoISP > ArduinoISP
- A sketch will open; upload it to the Uno.
- When uploading is done, unplug the Uno from the PC and close the IDE
https://www.instructables.com/Program-Arduino-Nano-Via-Uno
Connect the ICSP Shield to the Nano
Nano ICSP header
Burn Bootloader
- Connect Uno and open IDE
- Open the Tools > Board menu item, select “MiniCore”, and select “ATMega328”
- Set Variant: “328PB”
- Set Programmer: “Arduino as ISP”
- Select “Burn Bootloader”
- Disconnect the Uno and close the IDE.
Upload the sketch to the Nano using the Uno as ISP
- Connect the Uno and open the IDE
- Open sketch
- Open the Tools > Board menu item, select “MiniCore”, and select “ATMega328”
- Set Variant: “328PB”
- Set Programmer: “Arduino as ISP”
- Open Sketch > Upload Using Programmer
https://docs.arduino.cc/built-in-examples/arduino-isp/ArduinoISP
Conclusion
While programming the ATmega328 and ATtiny85 via the ICSP interface is straightforward, there are several steps involved, and it requires a special programmer.
In comparison, the “new range” (post 2017) of microcontrollers (eg ATtiny412, ATtiny1614, and ATtiny1616) uses a simpler “1-wire” programming protocol (rather than the 6 wires of ICSP). I’ll look at these next.
Reproduced with permission from Secret Diary of a Geek